
08.11.2023…..Good afternoon, my stampin’ friends! Today, I’m sharing a fun, colorful mini tutorial for some unique projects that I recently created for the Stampin’ Up! Corporate Facebook Page, featuring the Give It A Whirl Dies, from the current Stampin’ Up! 2023-2024 Annual Catalog! This catalog is sooooo jam-packed with soooooo many amazing stamps sets, accessories, and more. I know your wish list must be overflowing!
To view these projects, on the Stampin’ Up! Corporate Facebook Page, you can go to: https://www.facebook.com/stampinup

I love to use dies to add extra dimension and layers to my projects. Of course, the Give It A Whirl Dies are great for creating “spinner cards,” but there are also many ways to use the dies to add unique, unexpected twists to your cards and projects. Add your favorite sentiments, embellishments, and ribbon to make these projects your own.
Here are the products you will need:
Give It a Whirl Dies (154336)
Perched in a Tree Stamp Set (159791)
Charming Sentiments Stamp Set (159985)
Sentiment Silhouettes Dies (158733)
Timber 3D Embossing Folder (156406)
Quatrefoil Tile Embossing Folder (158655)
Stampin’ Cut & Emboss Machine (149653)
Basic White Thick Cardstock (159229)
Basic Black Cardstock (121045)
Bubble Bath Cardstock (161718)
Delightfully Eclectic Designer Series Paper (161640)
Zoo Crew Designer Series Paper (161304)
Balmy Blue Classic Stampin’ Pad (147105)
Versamark Pad (102283)
Basics Stampin’ Emboss Powders (155554)
Heat Tool (129053)
Blending Brushes (153611)
Sheer Ribbon Combo Pack (161635)
Black & White Gingham Ribbon (156485)
Linen Thread (104199)
Pastel Adhesive-Backed Gems (160387)
Iridescent Rhinestone Basic Jewels (158130)
Tear & Tape Adhesive (154031)
Mini Glue Dots (103683)
Stampin’ Dimensionals (104430)
Mini Stampin’ Dimensionals (144108)
Multipurpose Liquid Glue (110755)
Stampin’ Seal (152813)


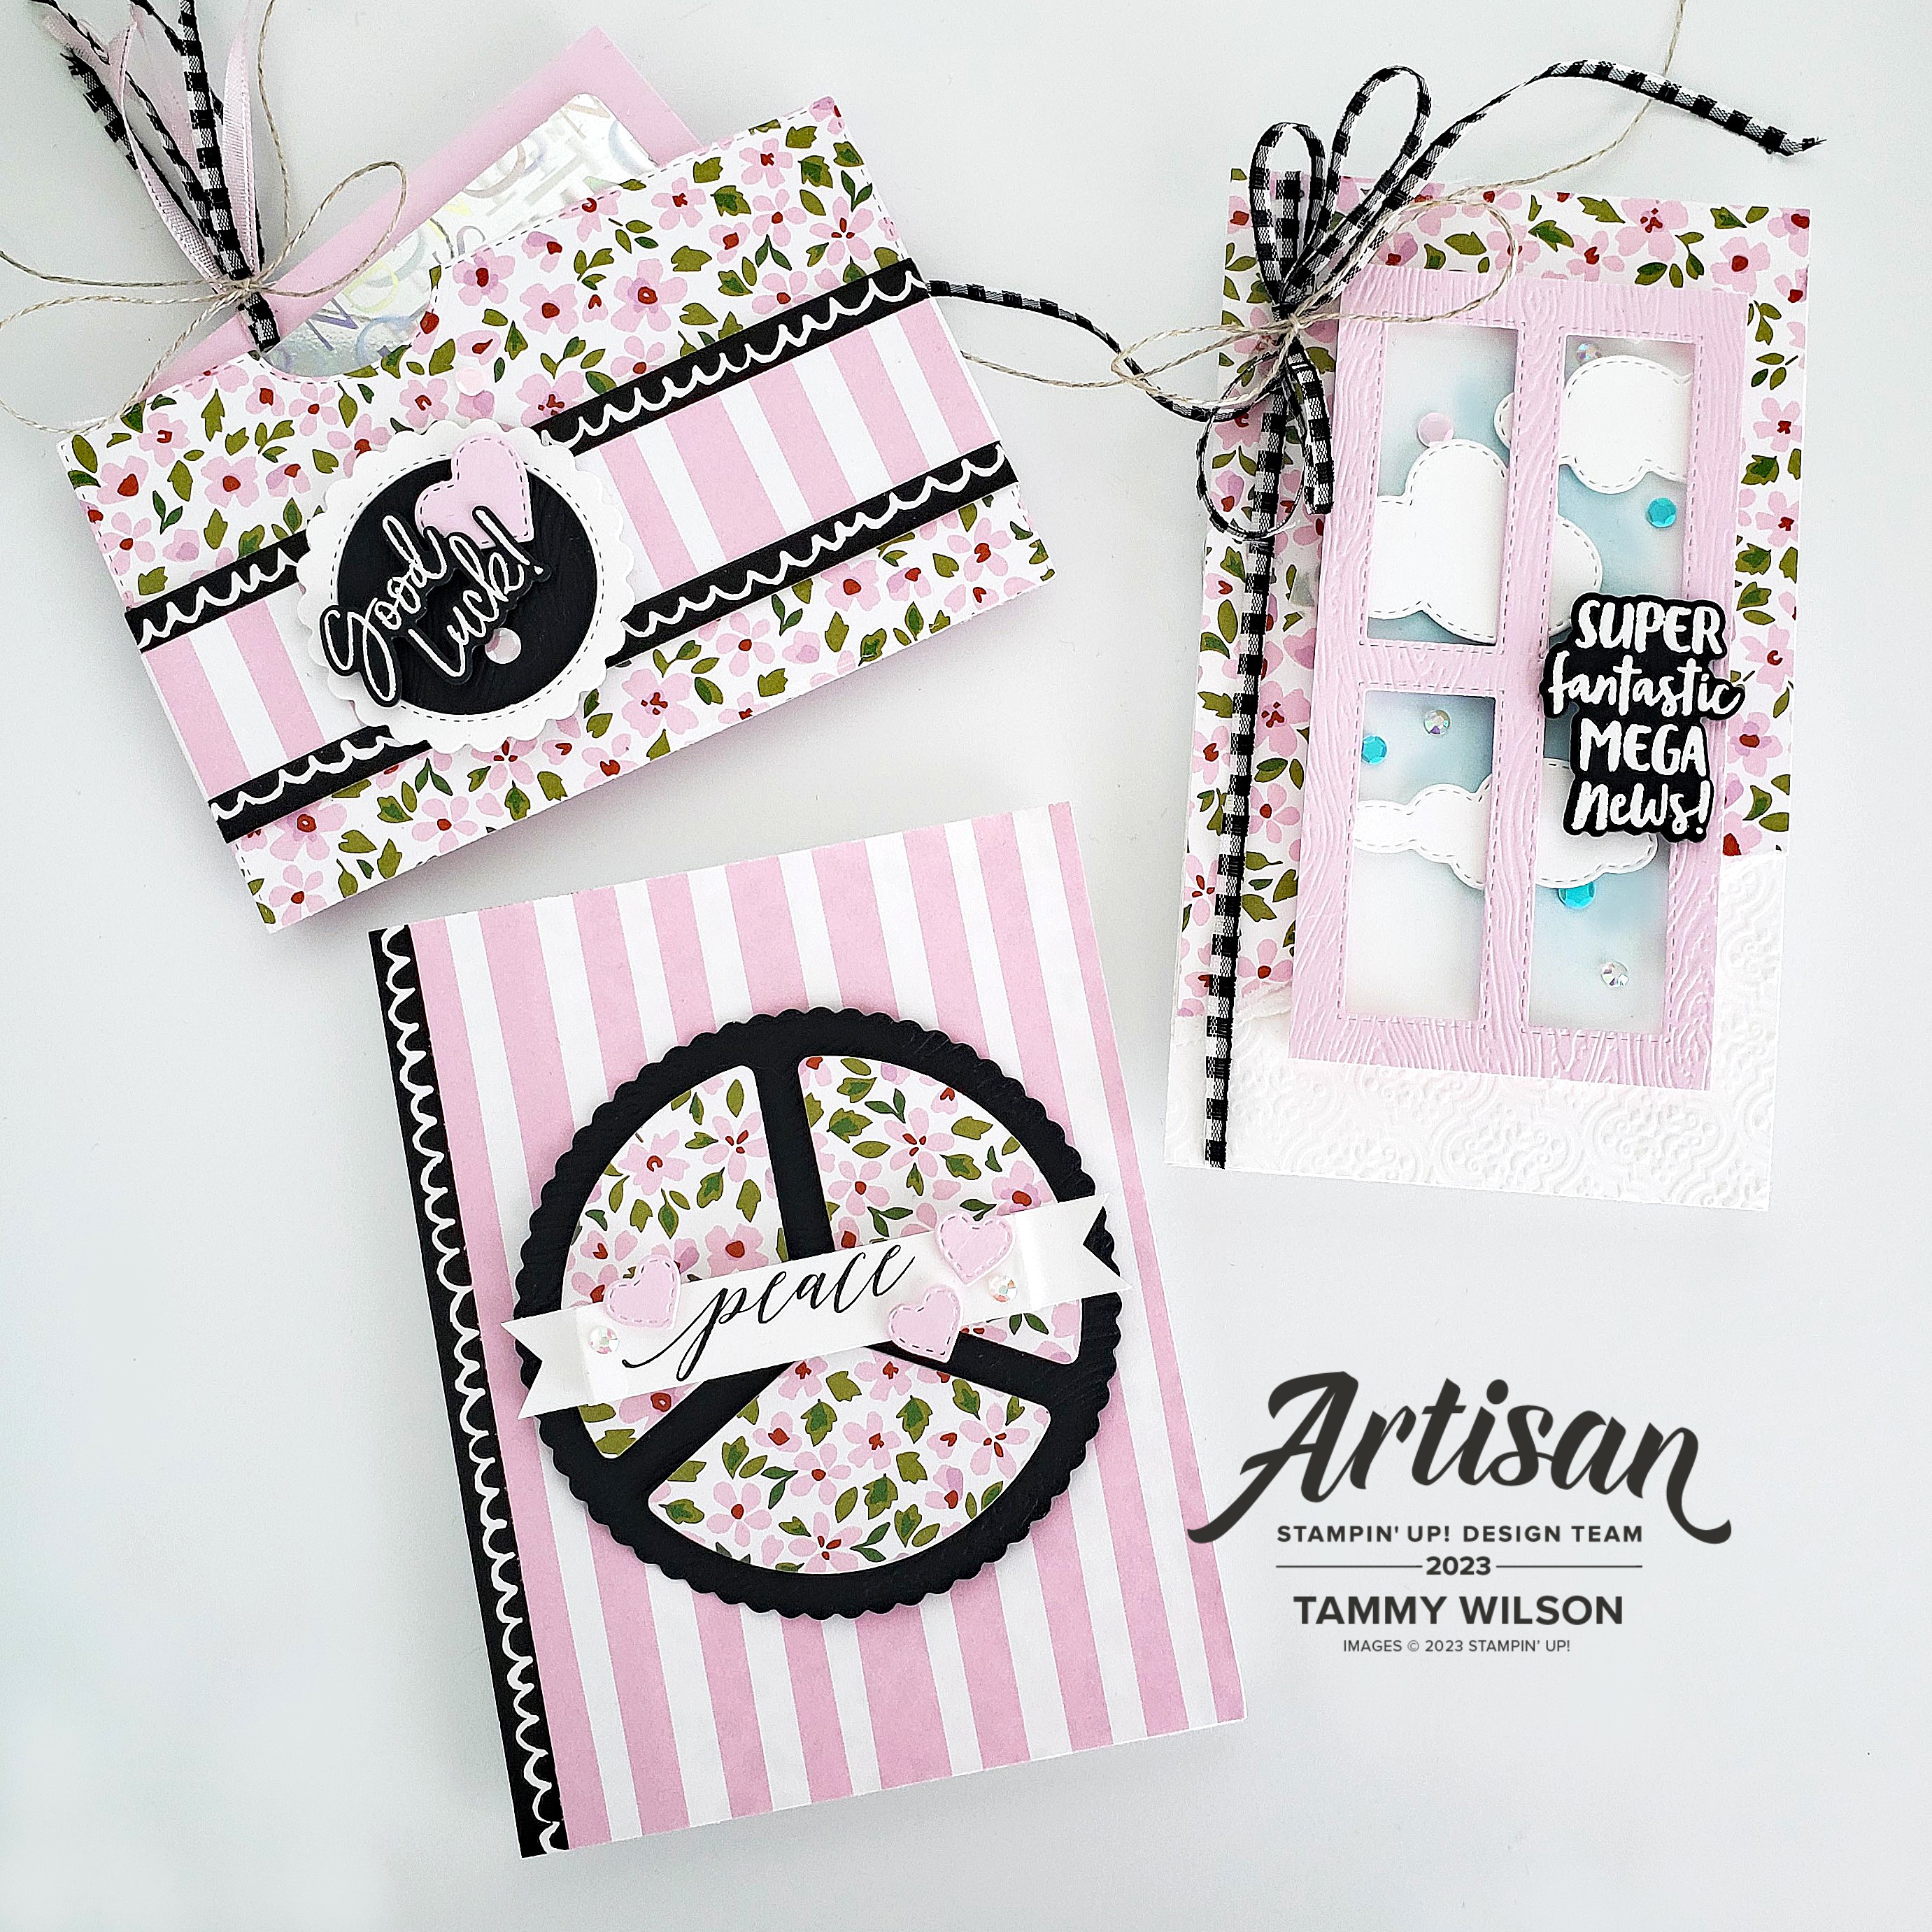
Gift Card Holder:
Use the large, notched rectangle die from the Give It a Whirl Dies to cut two rectangles—one from Delightfully Eclectic Designer Series Paper and one from Bubble Bath Cardstock.
To create the gift card holder, cut 1/4″ from the bottom of the Designer Series Paper rectangle and 1/4″ from the top of the cardstock rectangle. Use Tear & Tape Adhesive to adhere three sides of the gift card holder. Leave the top open so you can add a gift card.
For the belly band: cut 1″ strips of Delightfully Eclectic Designer Series Paper and 1-1/2″ strips of Zoo Crew Designer Series Paper, then layer them together.
To create the label, cut the Basic White Thick Cardstock and Basic Black Cardstock shapes using the small, scalloped circle die. Emboss the Basic Black Cardstock circle using the Timber 3D Embossing Folder. Cut a heart shape from Bubble Bath Cardstock and adhere it to the label.
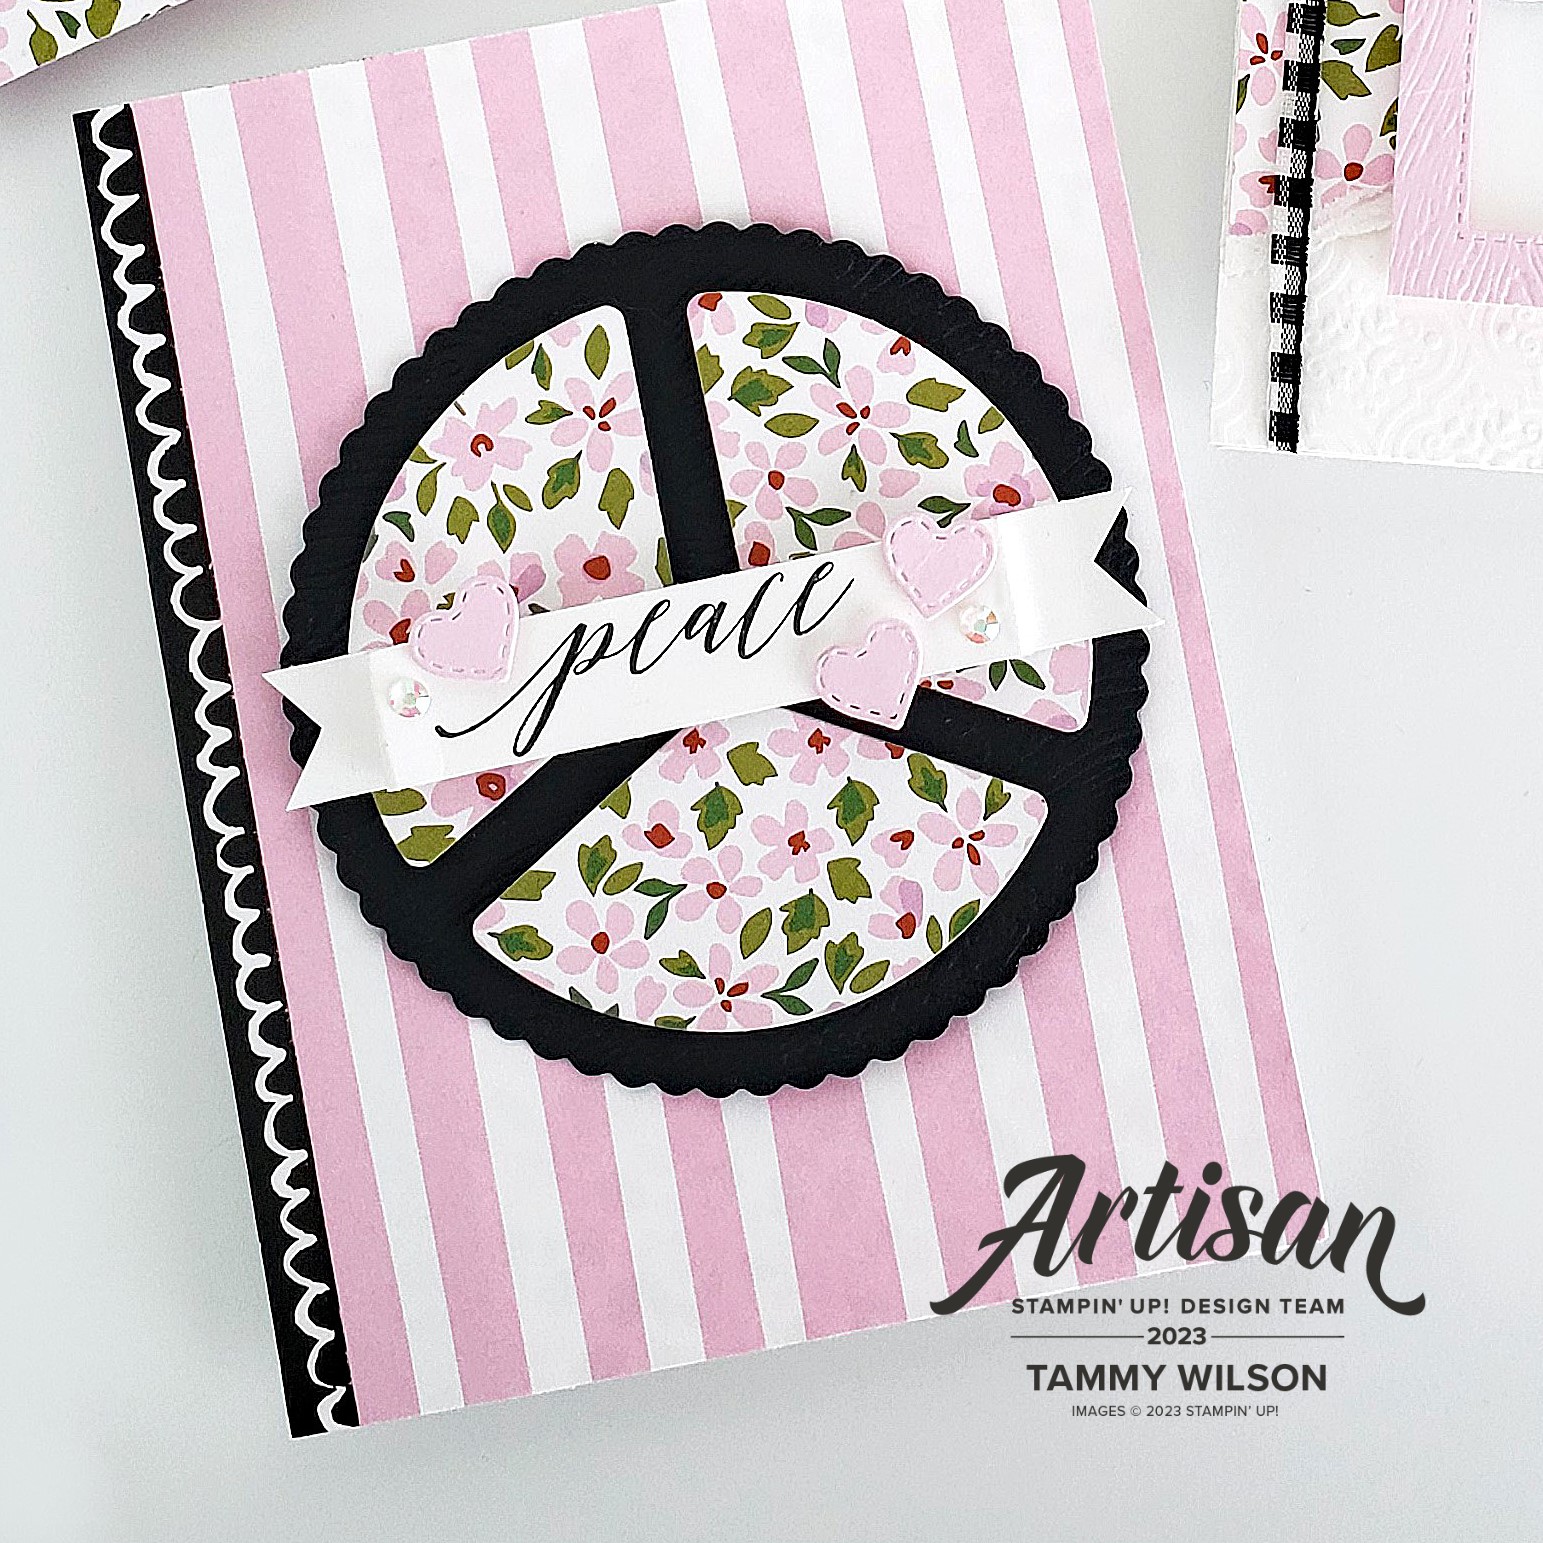
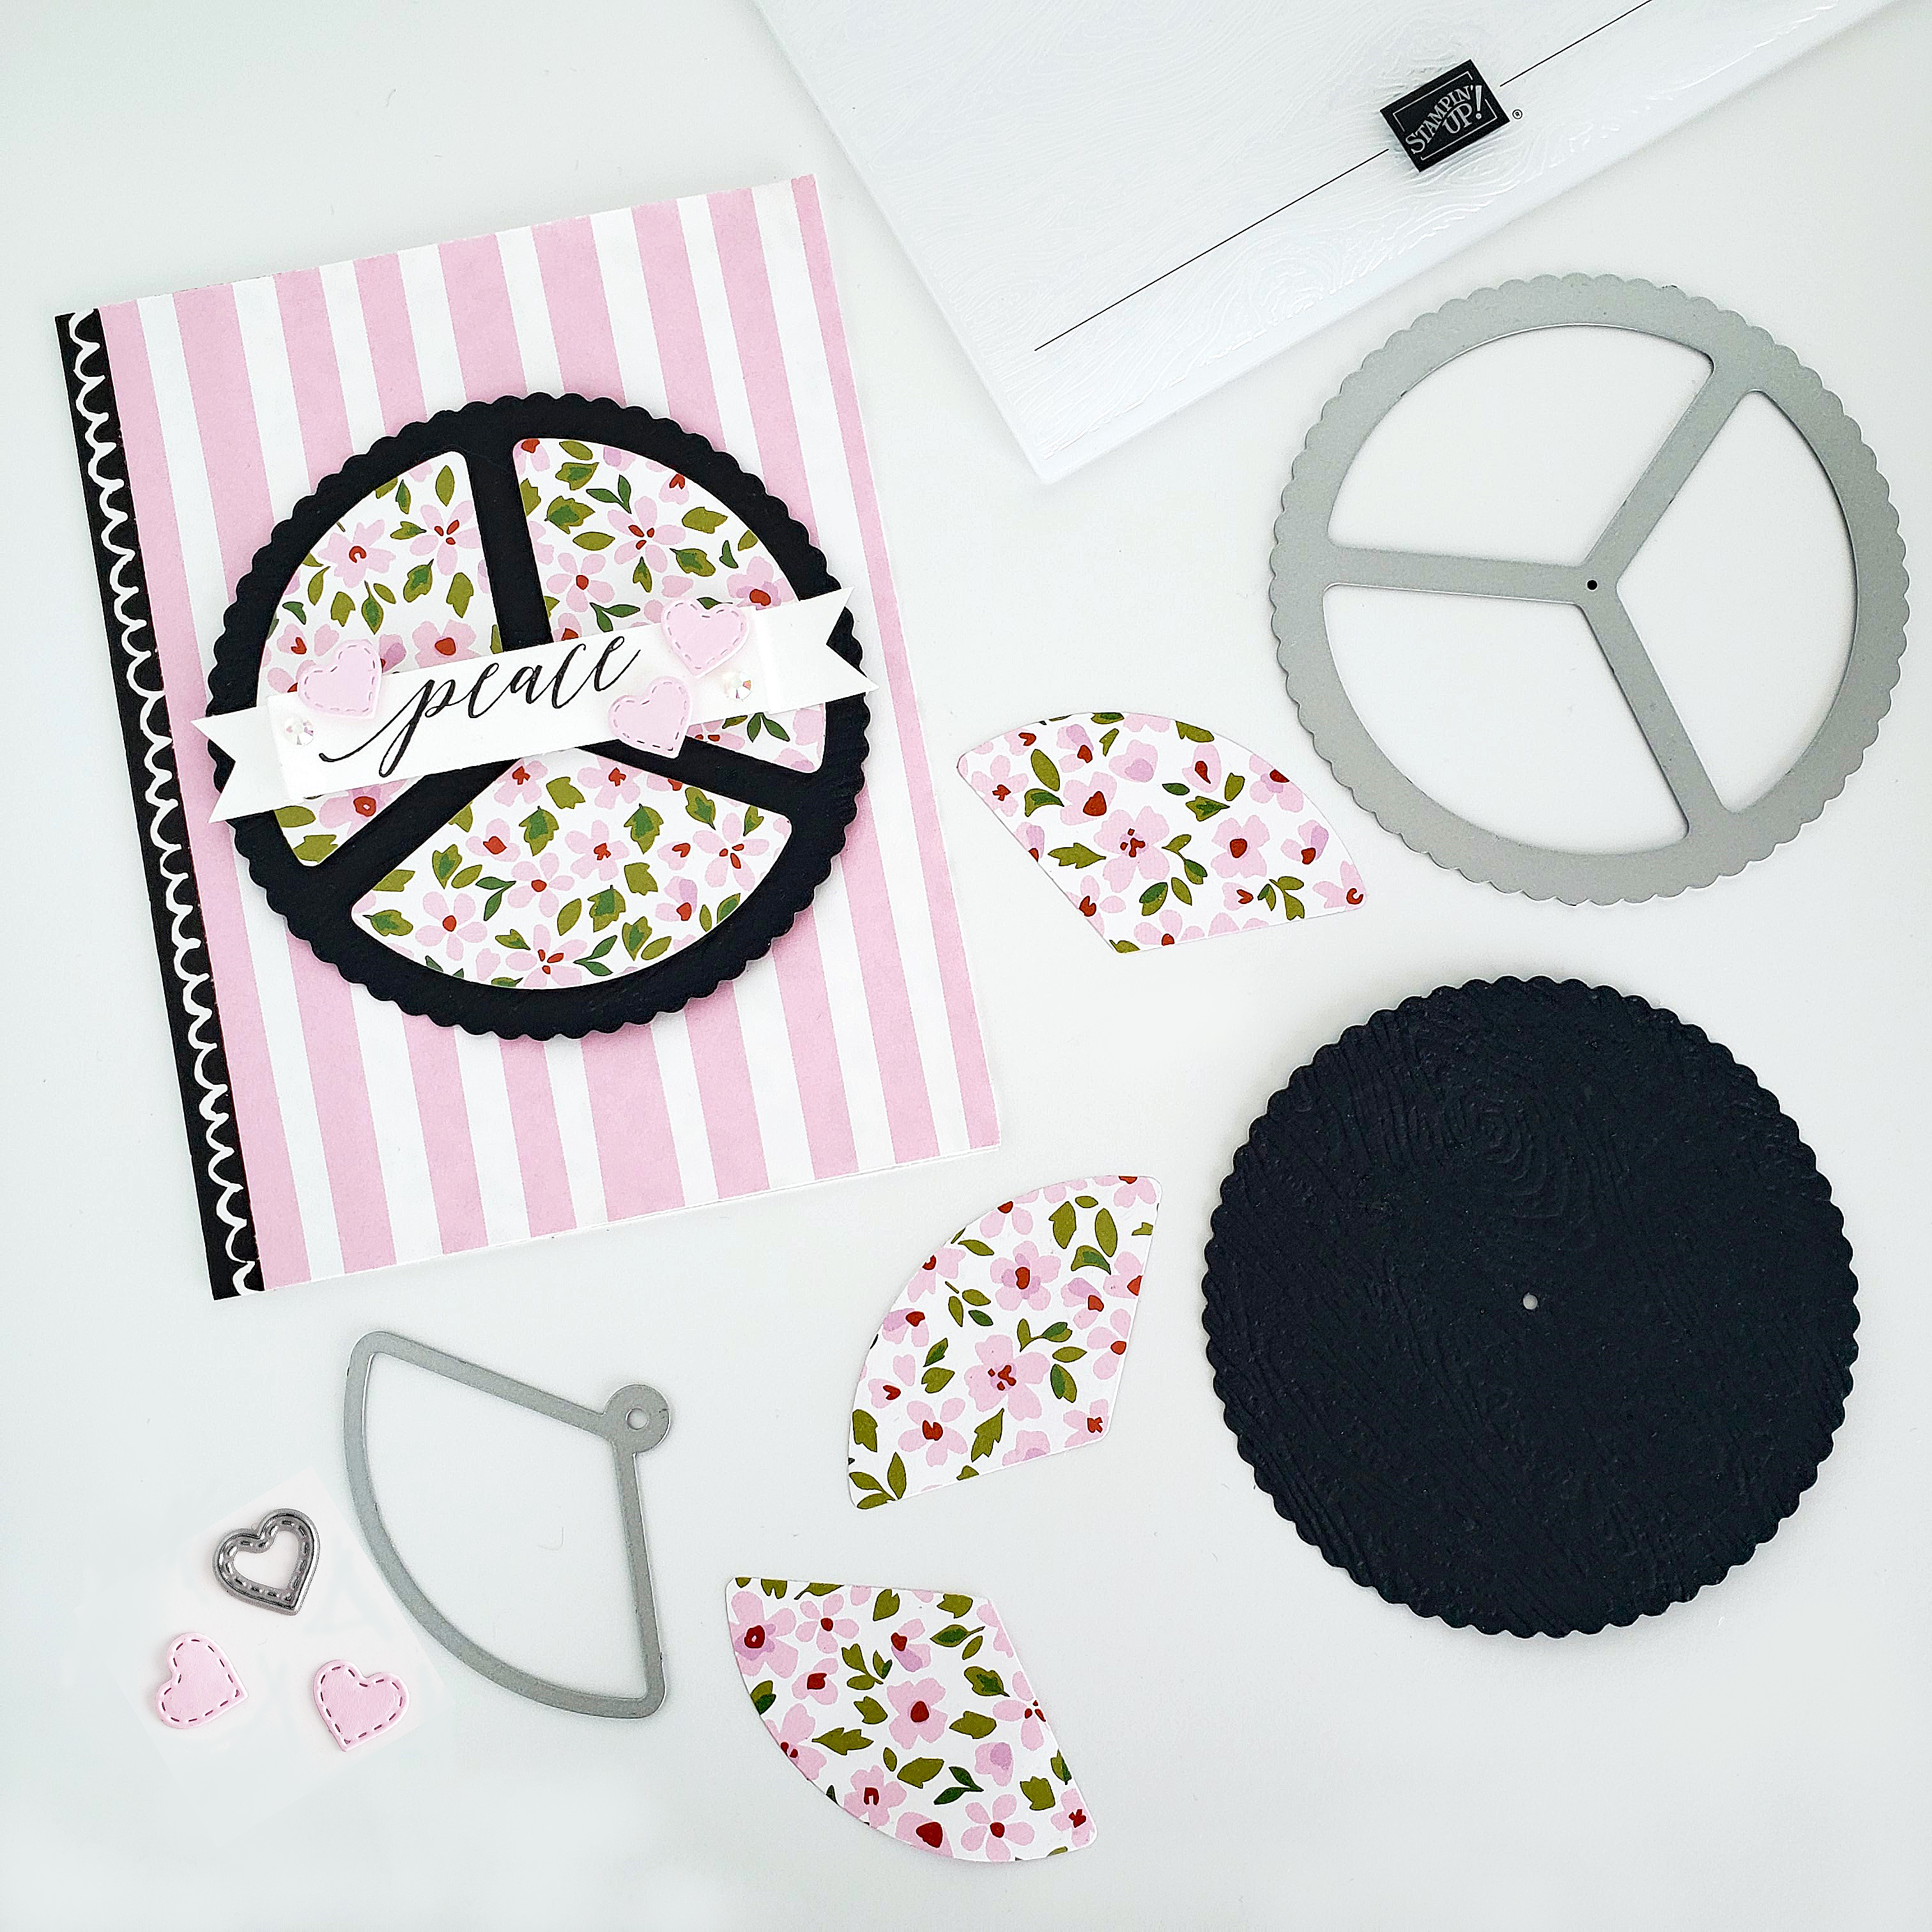
Peace Sign Card:
Use the large, scalloped circle die to cut a circle from Basic Black Cardstock, then emboss it using the Timber 3D Embossing Folder. Use the rounded rectangle die to cut out three rectangles and use Stampin’ Dimensionals to adhere them to the circle. Use the Perched In a Tree Stamp Set to add the “Peace” sentiment to a 1/4″ x 4″ strip of Basic White Thick Cardstock. Add three Bubble Bath Cardstock hearts to the sentiment (created with the heart die).


Window Card:
Use a 2-1/2″ x 4-3/4″ piece of Bubble Bath Cardstock to create the window. With the small, rectangle die, cut four rectangles from the cardstock, leaving an approximately 1/4″ border on all sides, and also in between each rectangle. Emboss the window with the Timber 3D Embossing Folder. To create the background for the window, cut a 2-1/2″ x 4-3/4″ piece of Basic White Thick Cardstock and use a Blending Brush to add swirls of Balmy Blue ink. Using the three cloud dies, cut cloud shapes from Basic White Thick Cardstock and adhere them using Stampin’ Dimensionals. Use Mini Stampin’ Dimensionals to adhere the window on top of the clouds.
I hope these projects inspire you to try these fun alternatives to add a unique twist to your cards and projects as well!
Wishing you creativity always,

To place an order through my Stampin’ Up! Demonstrator Website,
click on the shopping cart below…


Wow! Inspire you did. These cards were just what I needed to jump start my team challenge cards. Love all the designs.
Thanks so much for sharing.
Sue
LikeLike