
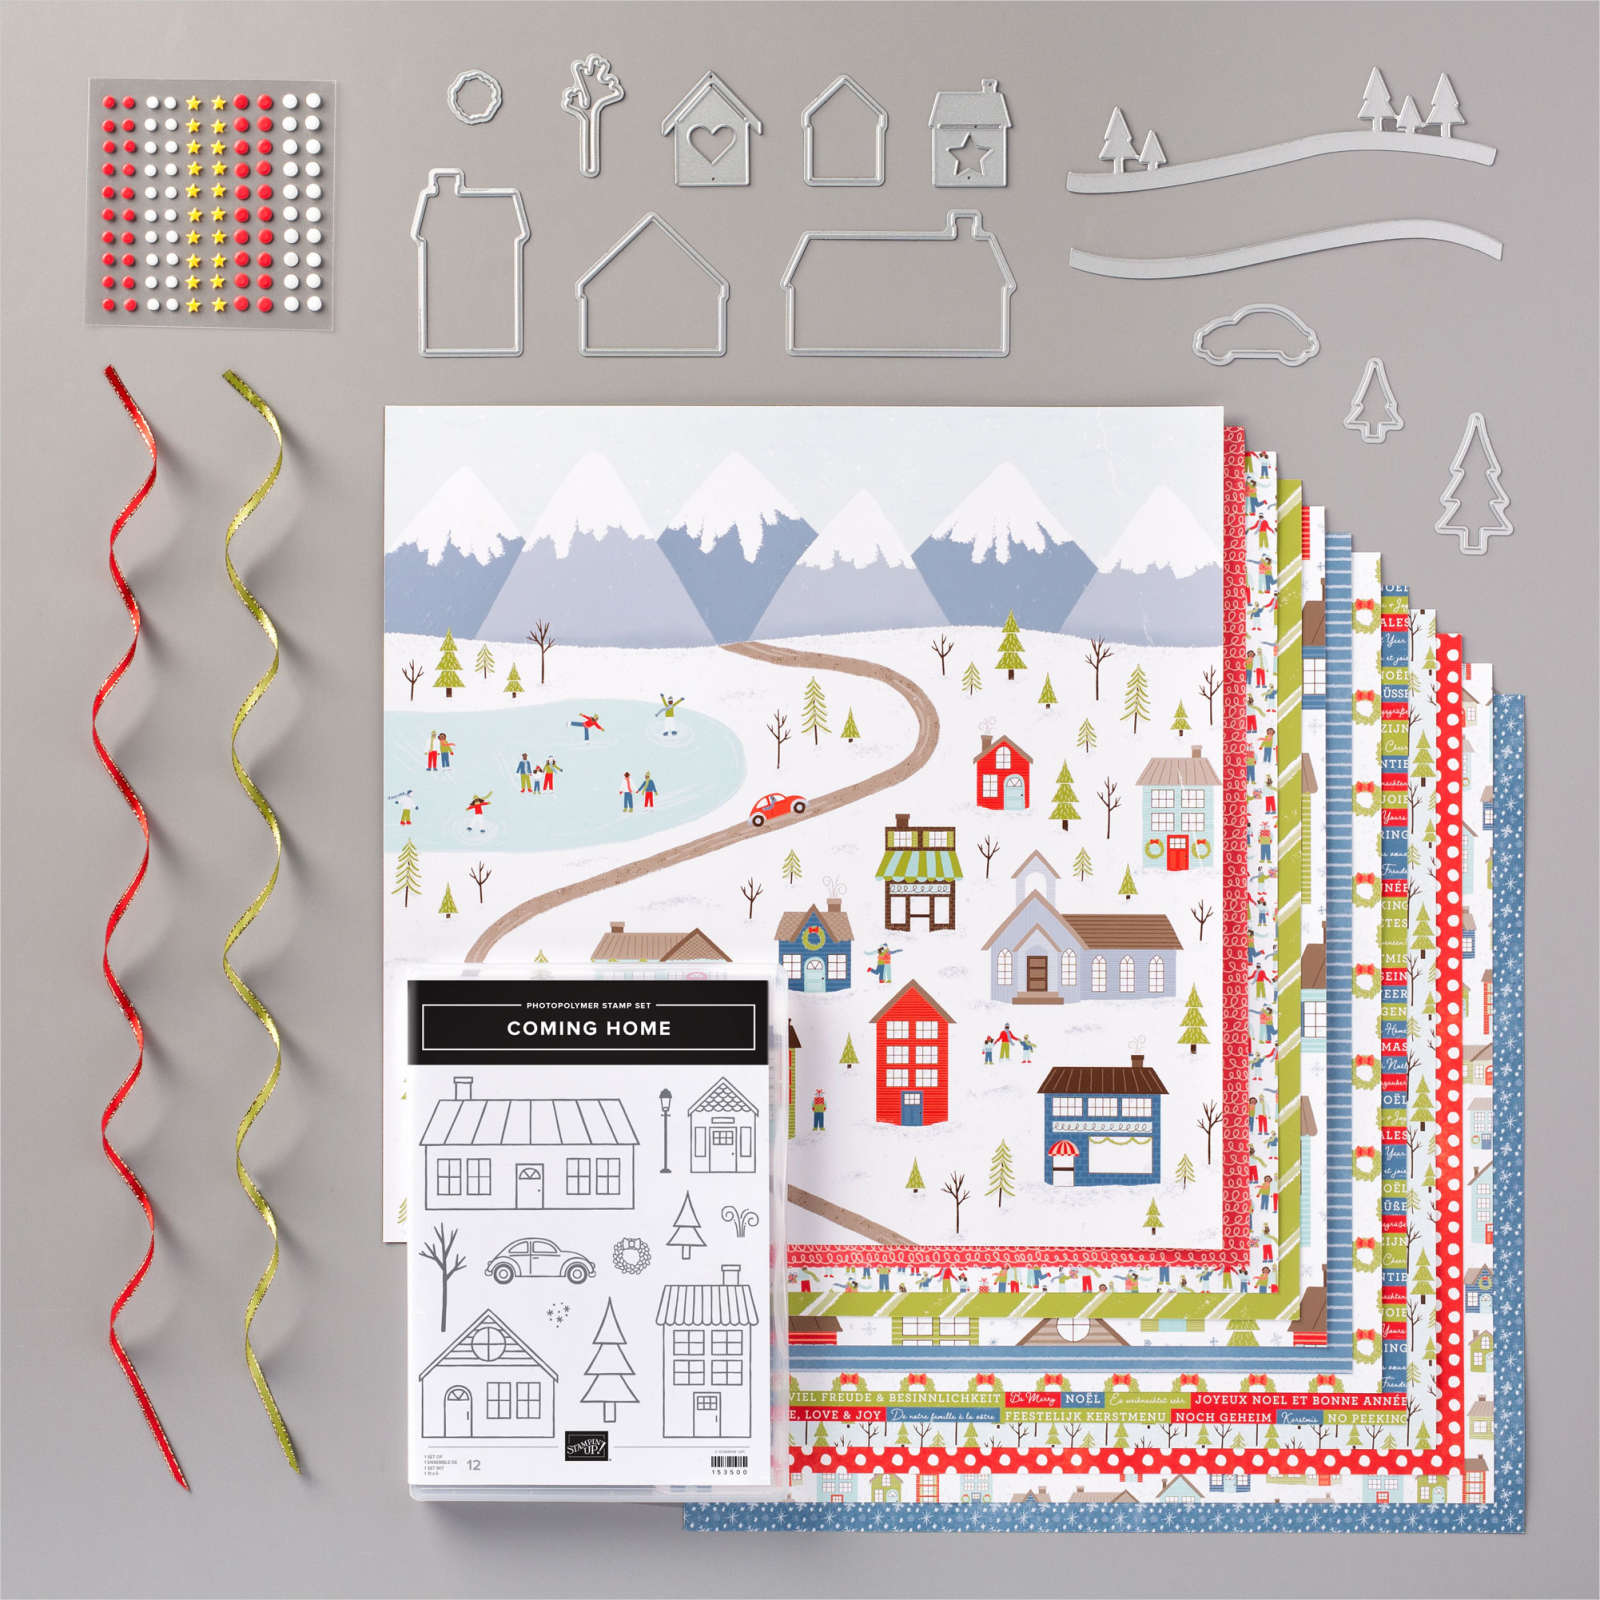
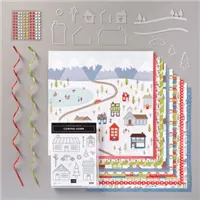
09.17.2020…..Happy Thursday, everyone! Hope everyone’s had a chance to squeeze in at least a bit of stamping and papercrafting this week! If you’re already hopping along with us today, you probably just came from Stesha’s blog. Aren’t her projects gorgeous!?! If you’ve just started your hop, the Artisan Design Team is featuring projects created with the Trimming the Town Suite and the Poinsettia Place Suite from the August – December 2020 Stampin’ Up Mini Catalog! Not only do these bundle include a stamp set full of festive images and sentiments…they also includes a some absolutely wonderful Designer Series Paper and accessories! Soooooo cool!!! The team has some absolutely amazing projects to inspire you today, and you will not want to miss a single one!
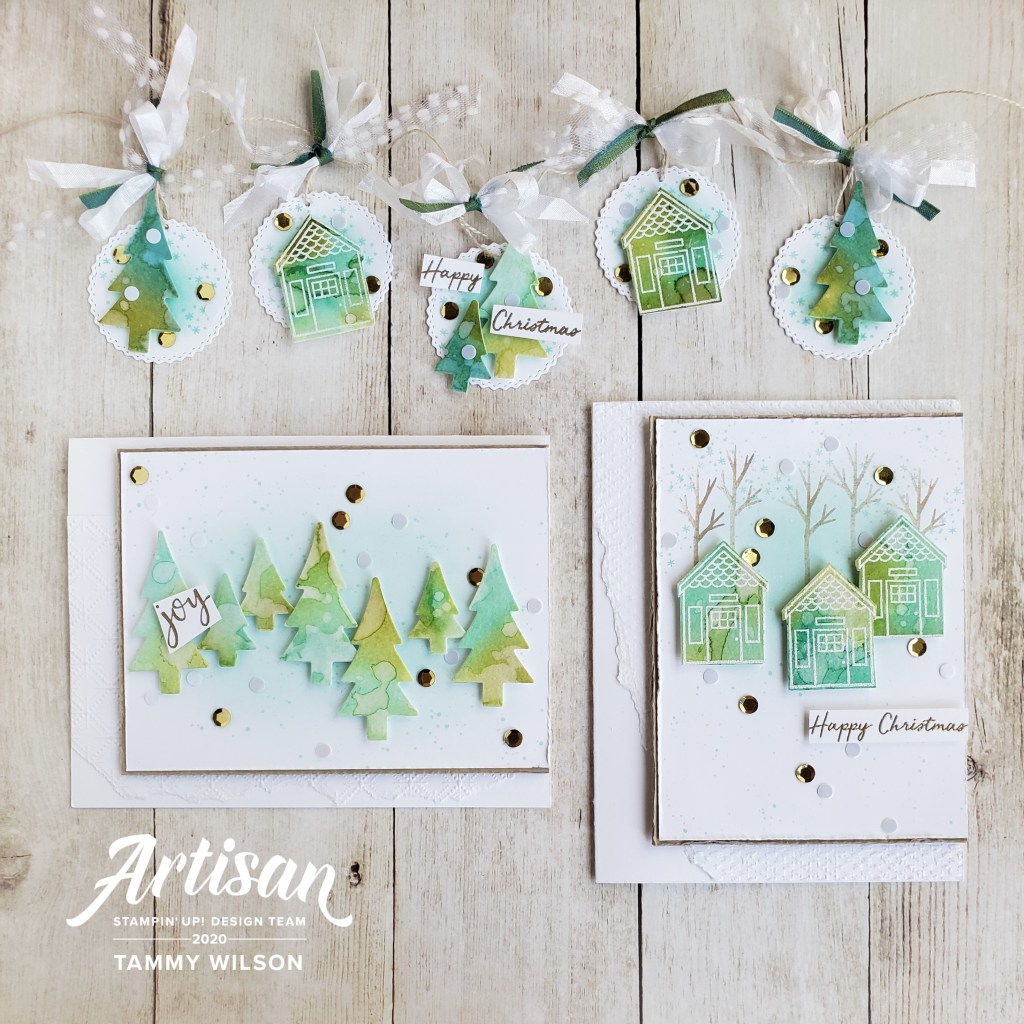
Today, I’m sharing a three projects that I created with the Trimming the Town Suite! I’ve also included complete instructions underneath each project, so you can scroll right to the card that suits your fancy and start creating!
Let’s start with the “Joy” card…
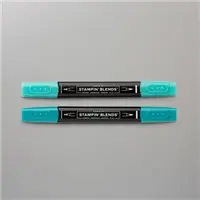
For this card, I started with some Whisper White Cardstock, embossed it with the Dainty Diamonds 3D Embossing Folder, tore the bottom edge, and adhered it to a Whisper White Thick Cardstock base. I then used a Sponge Dauber to add gently add some Coastal Cabana to another piece of Whisper White Cardstock, and added some speckling with my Light Bermuda Bay Stampin’ Blends Marker. (To create the speckling, I “flicked” the thick end of the marker against the inside edge of the marker cap, and “flicked” it outward towards my paper.) After I adhered it to some Crumb Cake Cardstock, I popped it up with a few Stampin’ Dimensionals.

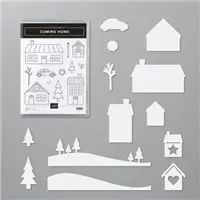
To create the trees, I used a piece of Fluid 100 Watercolor Paper, along with a Water Painter, Old Olive Classic Stampin’ Pad, and Bermuda Bay Classic Stampin’ Pad. I then misted the paper just a bit with my Stampin’ Spritzer (filled with water), then sat back and watched the magic happen. As the colors started to run together, I also added a few more spritzes here and there. After I was satisfied with the results, I used my Heat Tool to dry the paper. Once the paper was dry, I used the two tree dies (from the Coming Home Bundle) to cut out the trees, and popped them up with a few more Stampin’ Dimensionals. (I also cut out some extra trees to use with my “Happy Christmas” banner.)
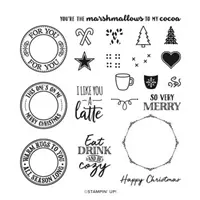
The sentiment (from the Peaceful Moments Stamp Set) was heat-embossed on Whisper White Cardstock, using my Versamark Pad and Gold Stampin’ Emboss Powder. After I cut it out, I popped it up with a couple of Mini Stampin’ Dimensionals. For a bit of bling, I sprinkled on several of the Sequins for Everything.
Next up is my “Happy Christmas” card…
For this card, I started with some Whisper White Cardstock, embossed it with the Tasteful Textile 3D Embossing Folder, tore the left edge, and adhered it to a Whisper White Thick Cardstock base. I then used a Sponge Dauber to add gently add some Coastal Cabana to another piece of Whisper White Cardstock, and added some speckling with my Light Bermuda Bay Stampin’ Blends Marker. (To create the speckling, I “flicked” the thick end of the marker against the inside edge of the marker cap, and “flicked” it outward towards my paper.) After I adhered it to some Crumb Cake Cardstock, I popped it up with a few Stampin’ Dimensionals. I also used the little tree stamp (from the Coming Home Bundle) to “stamp off” several Crumb Cake trees.
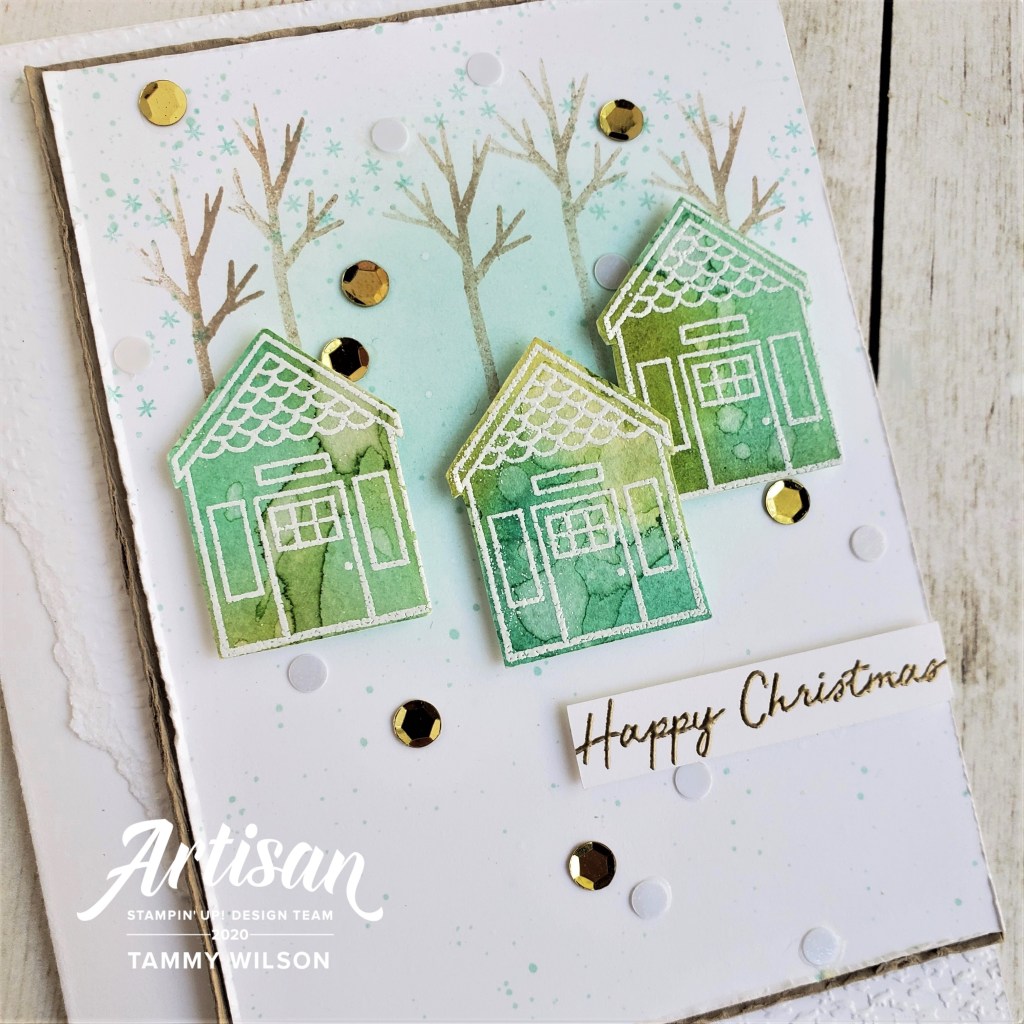
To create the little houses, I used a piece of Fluid 100 Watercolor Paper, along with a Water Painter, Old Olive Classic Stampin’ Pad, and Bermuda Bay Classic Stampin’ Pad. I then misted the paper just a bit with my Stampin’ Spritzer (filled with water), then sat back and watched the magic happen. As the colors started to run together, I also added a few more spritzes here and there. After I was satisfied with the results, I used my Heat Tool to dry the paper. Once the paper was dry, I heat-embossed the little houses (from the Coming Home Bundle), along with my Versamark Pad and Gold Stampin’ Emboss Powder. After I cut out the houses with the coordinating dies from the Coming Home Bundle, I popped them up with a few Stampin’ Dimensionals. (I also cut out two extra houses to use on my “Happy Christmas” banner.)
I used the two tree dies (from the Coming Home Bundle) to cut out several of the trees, and popped them up with a few more Stampin’ Dimensionals. The sentiment (from the Warm Hugs Stamp Set) was heat-embossed on Whisper White Cardstock, using my Versamark Pad and Gold Stampin’ Emboss Powder. After I cut it out, I popped it up with a couple of Mini Stampin’ Dimensionals. For a bit of bling, I sprinkled on several of the Sequins for Everything.
And, last but certainly not least, is my Happy Christmas Banner…
To create the little circles for my banner, I used the scalloped circle die (from the Tasteful Labels Dies) to cut out five Whisper White Thick Cardstock circles. I then used a Sponge Dauber to add gently add some Coastal Cabana to each circle, I “stamped off” several of the tiny snowflakes (from the Coming Home Bundle) in Coastal Cabana as well. I then several Stampin’ Dimensionals to adhere the extra trees and houses that I created. The sentiment (from the Warm Hugs Stamp Set) was heat-embossed on Whisper White Cardstock, using my Versamark Pad and Gold Stampin’ Emboss Powder. After I cut it out, I popped it up with a couple of Mini Stampin’ Dimensionals.

After I punched a tiny hole in the top of each circle, I used some Linen Thread to connect them together. For some festive texture, I added some Whisper White Crinkled Seam Binding Ribbon, Old Olive/Pretty Peacock Reversible Ribbon (cut in half vertically), and Whisper White Polka Dot Tulle Ribbon (also cut in half vertically). For a bit of bling, I sprinkled on several of the Sequins for Everything.
Up next on our blog hop is the incredibly talented Zsuzsanna Balazs, so be sure to head on over and check out the amazing projects that she and the the rest of the Artisan Design Team team have in store by clicking on the button below!

2020 Stampin’ Up! Artisan Design Team
Caroline van der Straaten
Emma Goddard
Helene den Breejen
Jan Clothier
Lauren Alarid
Leah Fedynak
Manuela Geiswinkler
Marine Wiplier
Martha Groger
Martin Stone
Narelle Farrugia
Nina Waldschmidt
Rochelle Blok
Stesha Bloodhart
Tammy Wilson
Zsuzsanna Balazs


The 2020-2021 catalog is sooooo jam-packed with soooooo many amazing stamps sets, accessories, and more….and I know your wish list will be overflowing before you know it!


To place an order, click on one of the supply items below:


So beautiful and chic! Love the colors you used as well.
LikeLike
More magical watercoloured goodness from you, Tammy! Love all of it, especially the tags.
LikeLike
Thank you bunches, Jan!
LikeLike
Beautiful. Just beautiful!
LikeLike
Awww…thanks so much, Christine!
LikeLike