
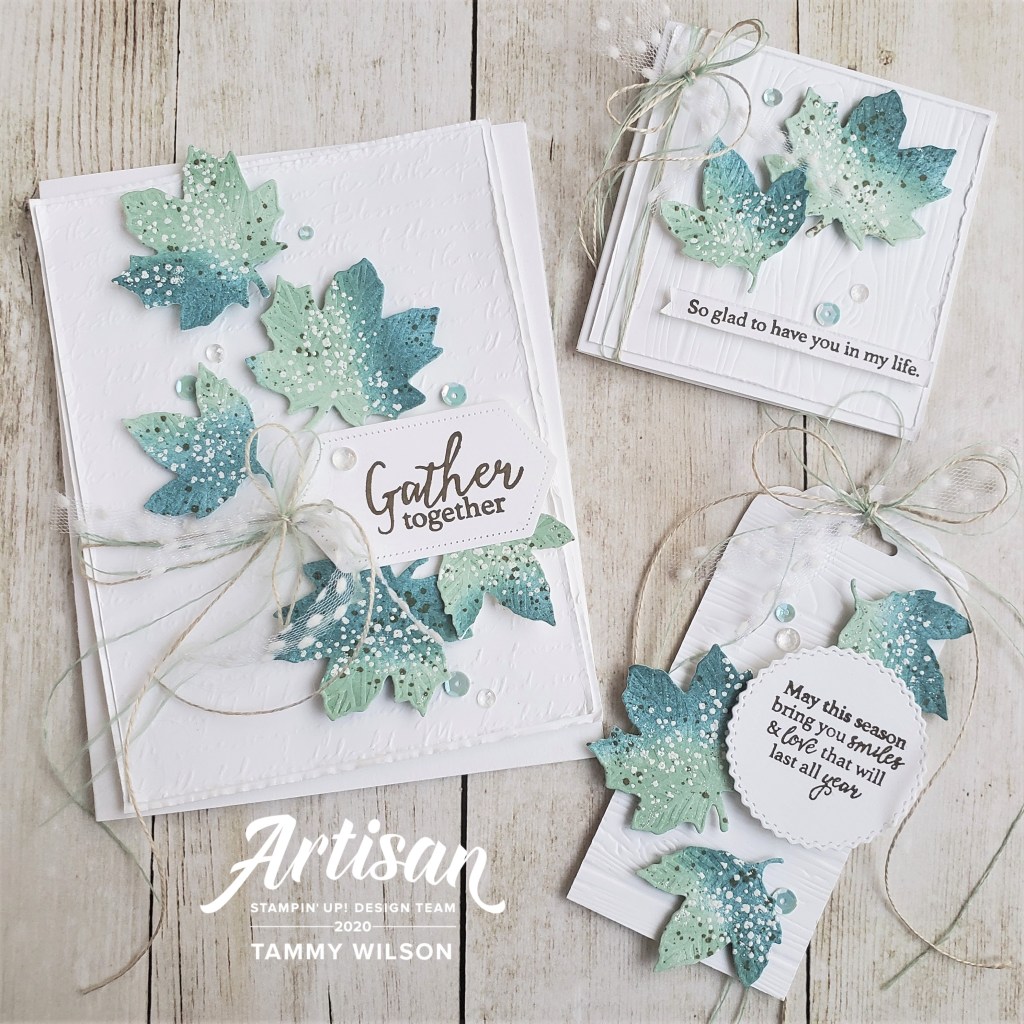
10.07.20…..Welcome to Wednesday, my stampin’ friends! I’m excited to share three projects with you today, using the Gather Together Bundle and a quick and easy sponging technique! (I’ve also included a quick tutorial for the sponging technique as well.) I hope my projects will inspire you just a bit, and you have fun experimenting with this colorful sponging technique!
The leaves for my three projects were die cut with two of the leaf dies from the Gather Together Bundle (Item 153036). To create the colorful paper for my leaves, I used a couple of Sponge Daubers (Item 133733 ), along with a Mint Macaron Classic Stampin’ Pad (Item 147106) and a Pretty Peacock Classic Stampin’ Pad (Item 150083 ), and added some color to a piece of Whisper WhiteThick Cardstock (Item 140272). I also added some speckling with my Soft Suede Stampin’ Blends Combo Pack (Item 154906), by “flicking” the thick end of the dark marker against the inside edge marker cap, and aiming it outward towards the paper.
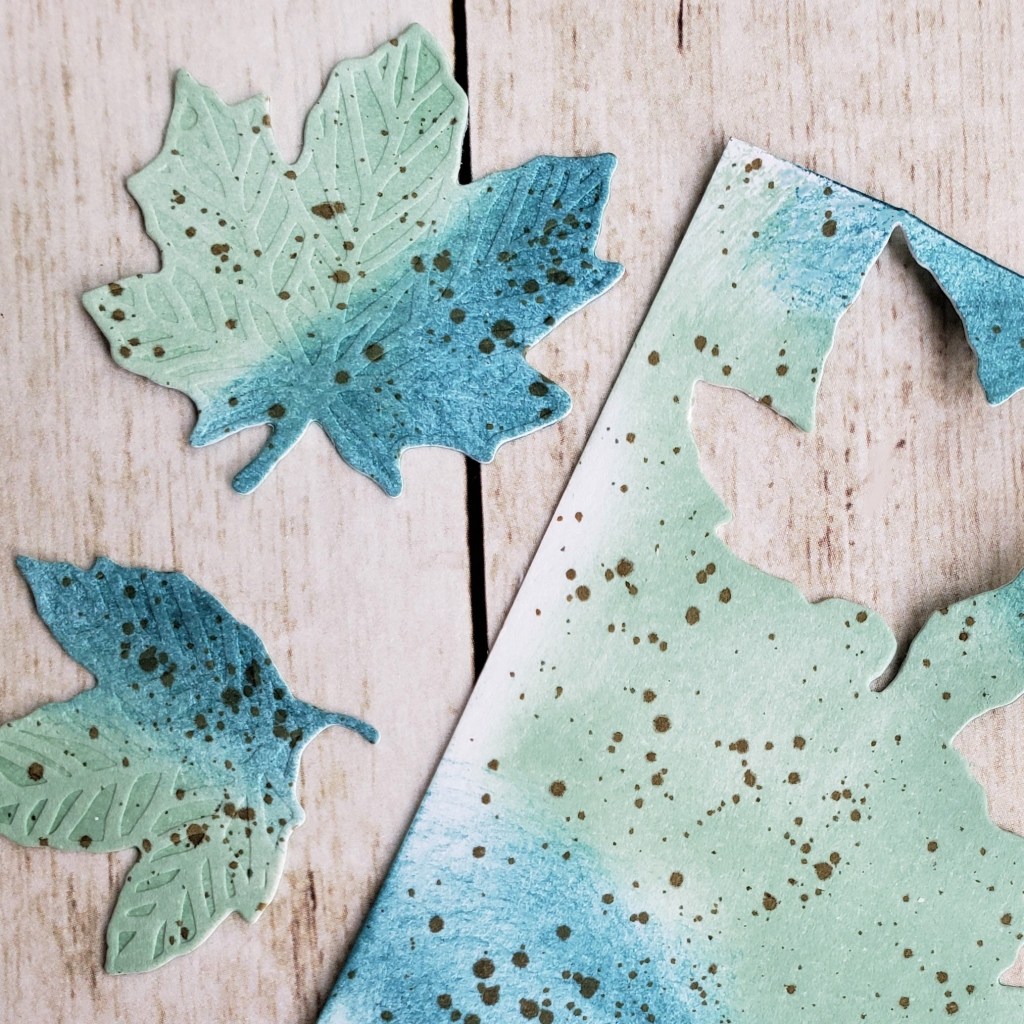
You’ll also notice, on my finished projects, that I stamped each one of the leaves with the little “speckle” stamp, from the Gather Together Bundle, using my Versamark Pad (Item 102283). I then sprinkled on some White Stampin’ Emboss Powder (Item 109132), shaking off the excess powder. I then used my Heat Tool to heat-set the powder.

For the full-size card. I started with some Whisper White Cardstock (Item 100730), embossed it with the Scripty 3D Embossing Folder (Item 149634), and layered a slightly larger piece of Whisper White Cardstock underneath. I then adhered five leaves, using some Stampin’ Dimensionals (Item 104430).
The sentiment (from the Gather Together Bundle) was stamped on Whisper White Cardstock, using my Early Espresso Classic Stampin’ Pad (Item 147114) and cut out with one of the Stitched Nested Label Dies (Item 149638). Before I popped up the sentiment with a few more Stampin’ Dimensionals, I added some Linen Thread (Item 104199), Whisper White Polka Dot Tulle Ribbon (Item 146912) which I cut in half vertically, and a few threads of the Mint Macaron Basket Weave Ribbon (from the Basket Weave & Metallic Ribbon Combo Pack (Item 153553).
I then used a few more Stampin’ Dimensionals to adhere the entire panel to a Whisper White Thick Cardstock base. For a little bit of bling, I sprinkled on a few of the Whale of a Time Sequins (Item 152461) and Elegant Faceted Gems (Item 152464).

For the mini card, I started with some Whisper White Cardstock, embossed it with the Pinewood Planks 3D Embossing Folder (Item 152320), and used a few Stampin’ Dimensionals to adhere it to a 3” x 3” Whisper White Thick Cardstock base. I then used a few more Stampin’ Dimensionals to adhere two of the leaves.
The sentiment (from the Gather Together Bundle) was stamped on Whisper White Cardstock, using my Early Espresso Classic Stampin’ Pad, cut out, and popped with a few Mini Stampin’ Dimensionals (Item 144108). I then added some Linen Thread, Whisper White Polka Dot Tulle Ribbon (cut in half vertically), and a few threads that I pulled out from the Mint Macaron Basket Weave Ribbon (from the Basket Weave & Metallic Ribbon Combo Pack. For a little bit of bling, I sprinkled on a couple Whale of a Time Sequins and one of the Elegant Faceted Gems.
For the gift tag, I embossed a 2” wide strip of Whisper White Thick Cardstock with the Pinewood Planks 3D Embossing Folder, and punched the top of the tag with the Scalloped Tag Topper Punch (Item 133324). I then used a few Stampin’ Dimensionals to adhere three of the leaves.
The sentiment (from the Gather Together Bundle) was stamped on Whisper White Cardstock, using my Early Espresso Classic Stampin’ Pad, cut out with one of the Tasteful Labels Dies (Item 152886), and popped with a few more Stampin’ Dimensionals. I also added some Linen Thread, Whisper White Polka Dot Tulle Ribbon (cut in half vertically), and a few threads that I pulled out from the Mint Macaron Basket Weave Ribbon (from the Basket Weave & Metallic Ribbon Combo Pack. For a little bit of bling, I sprinkled on a couple of Whale of a Time Sequins and one of the Elegant Faceted Gems.
Wishing you creativity always,


The 2020-2021 catalog is sooooo jam-packed with soooooo many amazing stamps sets, accessories, and more….and I know your wish list will be overflowing before you know it!


Hi Tammy;
Did I miss the a quick tutorial for the sponging technique. thsi si all is says in your directions
To create the colorful paper for my leaves, I used a couple of Sponge Daubers (Item 133733 ), along with a Mint Macaron Classic Stampin’ Pad (Item 147106) and a Pretty Peacock Classic Stampin’ Pad (Item 150083 ), and added some color to a piece of Whisper WhiteThick Cardstock (Item 140272).
LikeLike
Hi Donata! I used the Sponge Daubers to randomly apply the ink to the paper, which is shown in one of the pictures, and then cut them out with the leaf dies. So sorry if thus seemed unclear. Is there something that I can can clarifying further for you?
LikeLike
To apply the ink, I gently swirled the Sponge Dauber on the paper. Hope that helps. 😀
LikeLiked by 1 person