
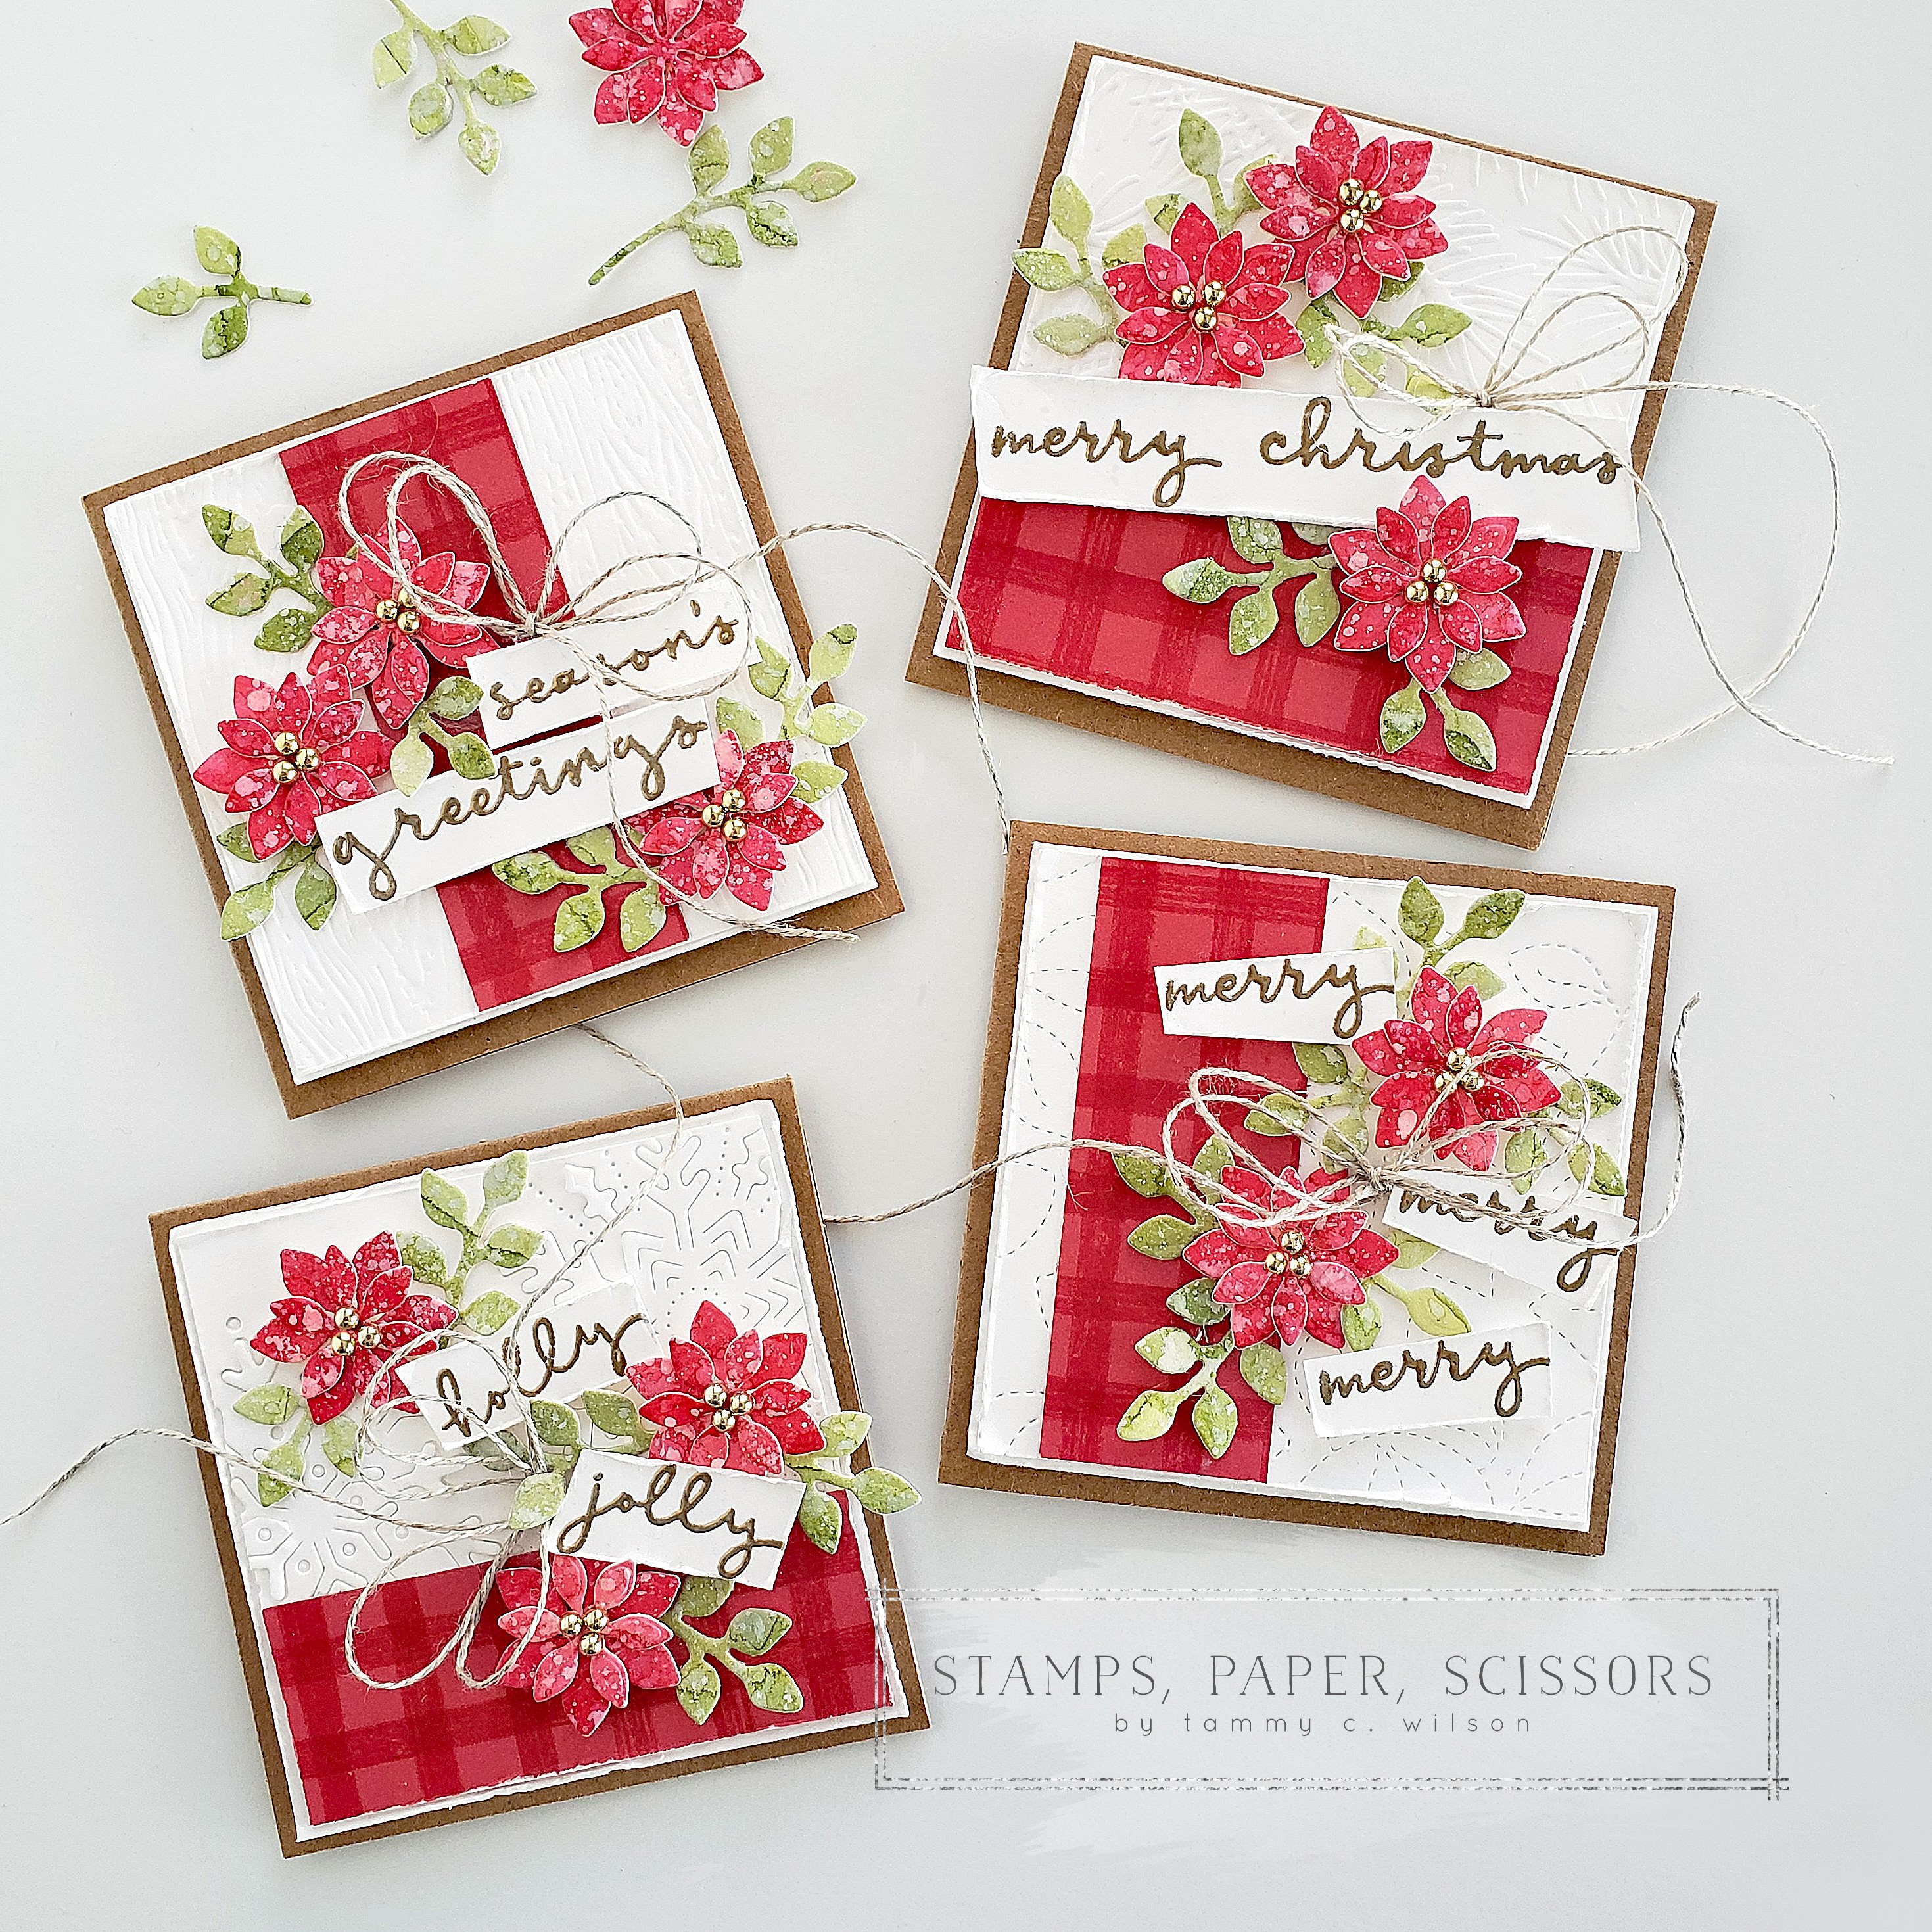
12.13.2022…..Happy Tuesday, my stampin’ friends! One of my favorite things to do is to create little 3″ x 3″ notecards. And today…..I decided to create four of them, with a festive, holiday theme. I just love how the little poinsettias turned out, and they added such a traditional, but also shabby chic, look to these little cards. Hope these 3″ x 3″ card inspire you to create some festive little projects as well!
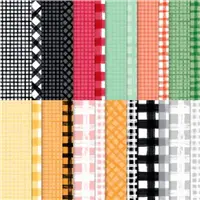
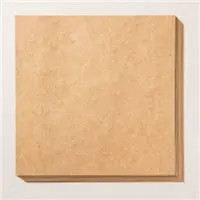
To create each card, I started with a 3″ x 3″ Kraft Paper base. I then used Basic White Thick Cardstock, and Gingham Cottage Designer Series Paper to create the next layers.
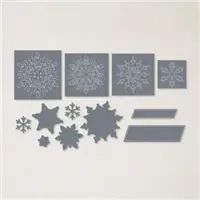
For the “Season’s Greetings” card, I embossed the Basic White Thick Cardstock with the Timber 3D Embossing Folder. For the “Merry Christmas” card, I used one of the Wintry 3D Embossing Folders. For the “Holly Jolly” card, I used one of the Frosted Flurry Dies to create the background. And…for the “Merry Merry Merry” card, I used the Stitched Greenery Die.
Under each of the embossed/die cut background, I added a slightly larger piece of Basic White Thick Cardstock, and used Stampin’ Dimensionals to adhere the entire panel to the card base.

To create the poinsettias, I used a Water Painter to add Real Red to Fluid 100 Watercolor Paper. I then my Water Painter to “flick” water droplets on the paper. Once the water droplets were dry, I used another Water Painter with a few drops of my White Craft Ink Refill (mixed with a tiny bit of water) to add some white speckles. (To create the speckling, I “flicked” the end of the brush against the inside edge of the brush cap, and “flicked” outward towards the cardstock.) You may also want to use a Heat Tool to dry the water droplets and the speckles of white ink.
Once the paper was dry, I used two poinsettia dies (from the Pretty Pillowbox Dies) to cut out several poinsettias. To create each one, I layered a small flower on top of a larger flower, then popped up each one with a Mini Stampin’ Dimensional.

To create the leaves, I used a Water Painter to add Old Olive and Mossy Meadow to Fluid 100 Watercolor Paper. I then my Water Painter to “flick” water droplets on the paper. Once the water droplets were dry, I used another Water Painter with a few drops of my White Craft Ink Refill (mixed with a tiny bit of water) to add some white speckles. (To create the speckling, I “flicked” the end of the brush against the inside edge of the brush cap, and “flicked” outward towards the cardstock.) You may also want to use a Heat Tool to dry the water droplets and the speckles of white ink.
Once the paper was dry, I used the two little leaf dies (from the Grove Dies) to cut out several leaves. I then tucked them underneath the poinsettias.

Each of the sentiments (from the Christmas to Remember Stamp Set) were heat-embossed on Basic White Thick Cardstock, using my Versamark Pad and Gold Stampin’ Emboss Powder. After I cut them out, I popped them up with Mini Stampin’ Dimensionals.
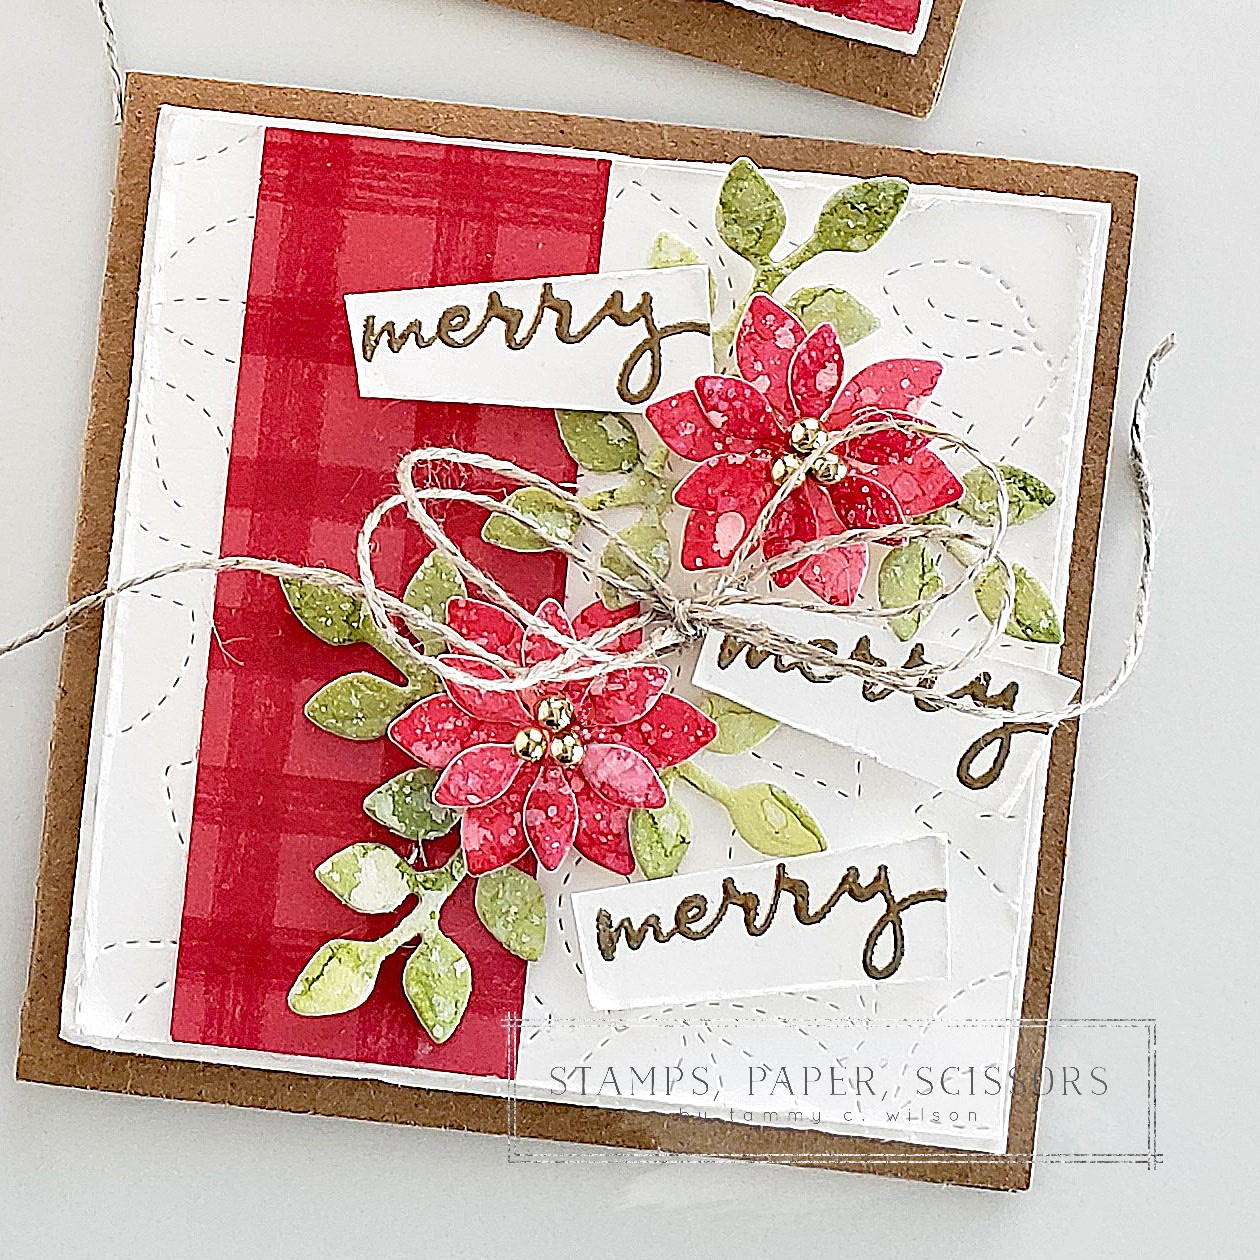
To create each of the bows, I used Linen Thread. Forbit of bling, I added Festive Pearls in the center of each poinsettia.
Wishing you creativity always,


To place an order, click on the catalog image above, or one of the supply items below:


Sale: $18.00
Price: $30.00


This set of 4 ‘Christmas To Remember’ 3 x 3 mini notecards are really lovely! I have admired your water colouring technique cards for a while now, for those of us who are a little daunted at the prospect and would love to give this a go, would you consider a short video to show the artist in action as it were. It would definitely give the gentle push of confidence if we could see how you go about this, to give it a try ourselves. Thanks.
LikeLike
Oh, my goodness! These are the most exquisite creations! Love all your how to details. Thanks for sharing with us.
LikeLiked by 1 person